Guide to Your First Project
This guide details the five steps required to create your first project in InverseHub.
Table of contents
Step 1: Setup Working Environment
- Install the latest version of SimReader.
- Create an InverseHub account on the website. Verify your email to log in.
- Open SimReader and select
Settingsfrom the side menu.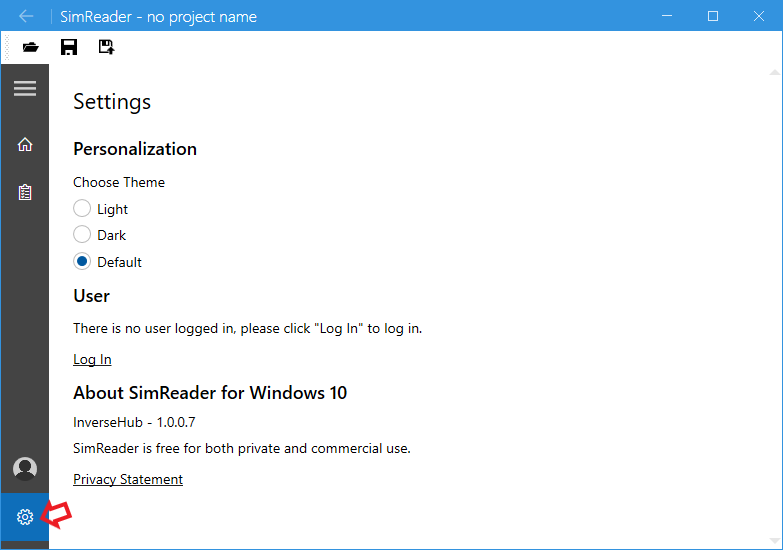
- Enter your InverseHub login details to establish communication.
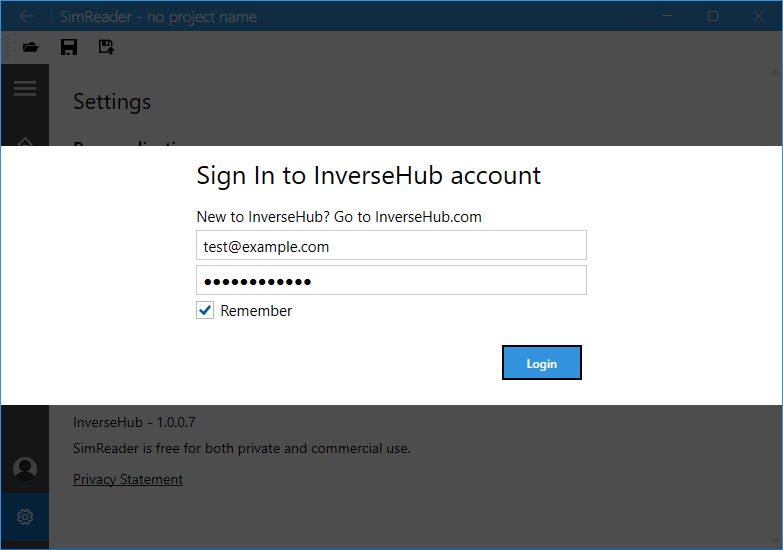
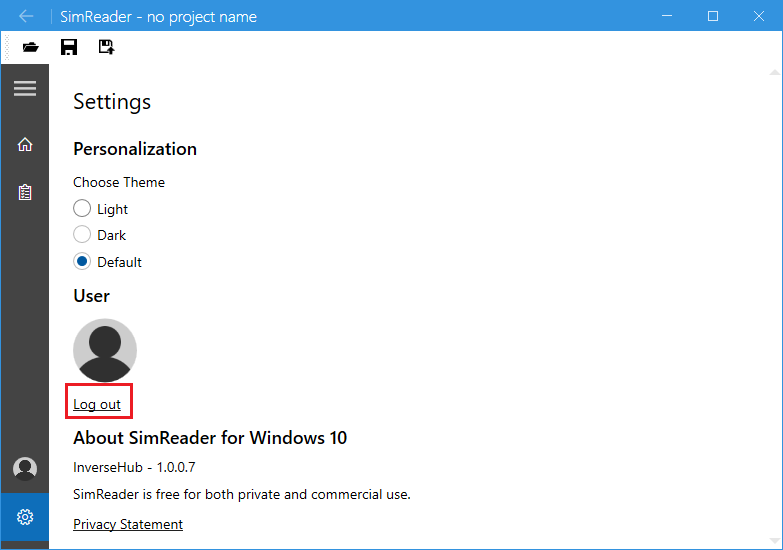
- Logout option will appear once logged in.
Step 2: Create a Project on InverseHub
- Log in to your InverseHub account, go to
All Projects. Click on the
New Projectbutton.
Select a report type and choose a
project name(the project name doesn’t need to be unique).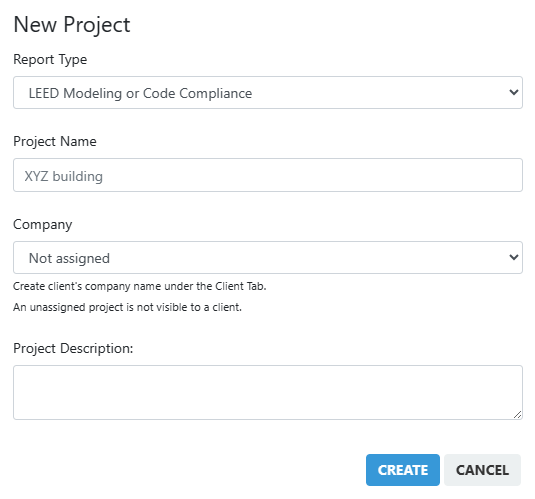
- Go back to the Overview tab and click on the name of the project.
Step 3: Complete a Model Input Summary
Recommended Workflow
The Simulation Program and Weather File in the Energy Model Information are automatically filled from the SIM files.
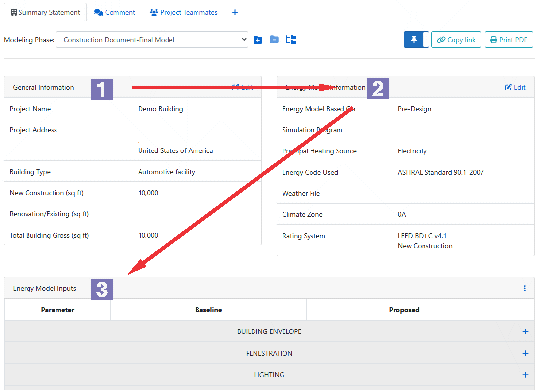
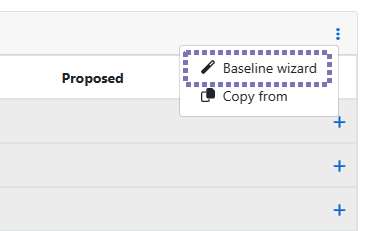
Baseline Wizard
To run the Baseline Wizard, click on the vertical dots.
To add items, simply select them and then click on the confirm button.
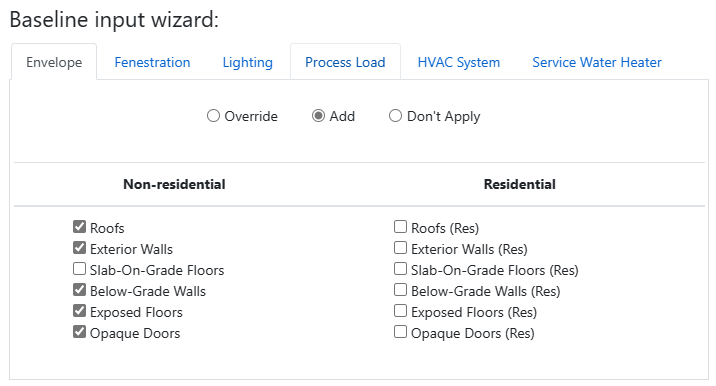
- Override
- update the selected item if they exist.
- Add
- add selected items
- Don’t Apply
- selected items are not added of updated.
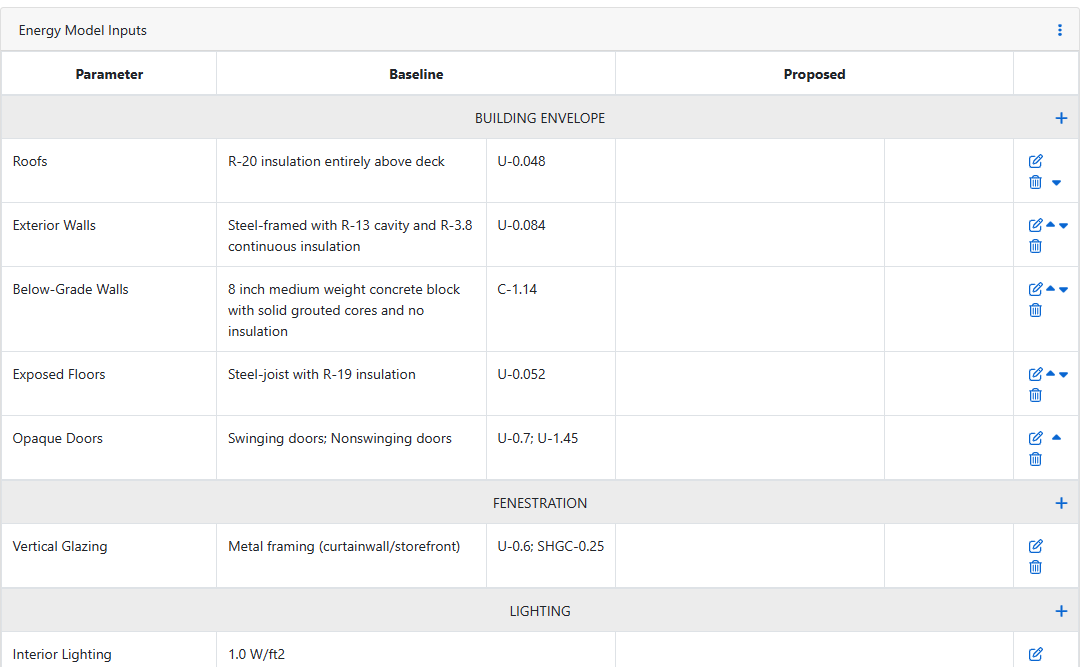
- The Baseline Column is automatically populated based on the selected Energy Code in the Energy Model Information table. You only need to complete the Proposed column.
Step 4: Upload Modeling Outcomes to InverseHub
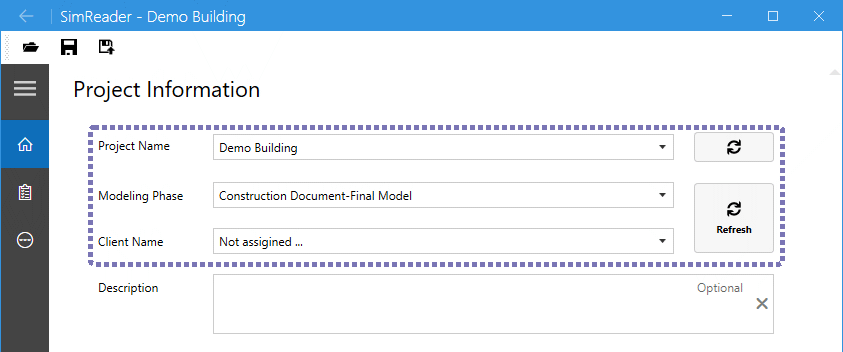
Launch SimReader and select a project name.
The Modeling Phase and Client Name will be automatically updated to match those in InverseHub. To reset, simply click the “Refresh” button.
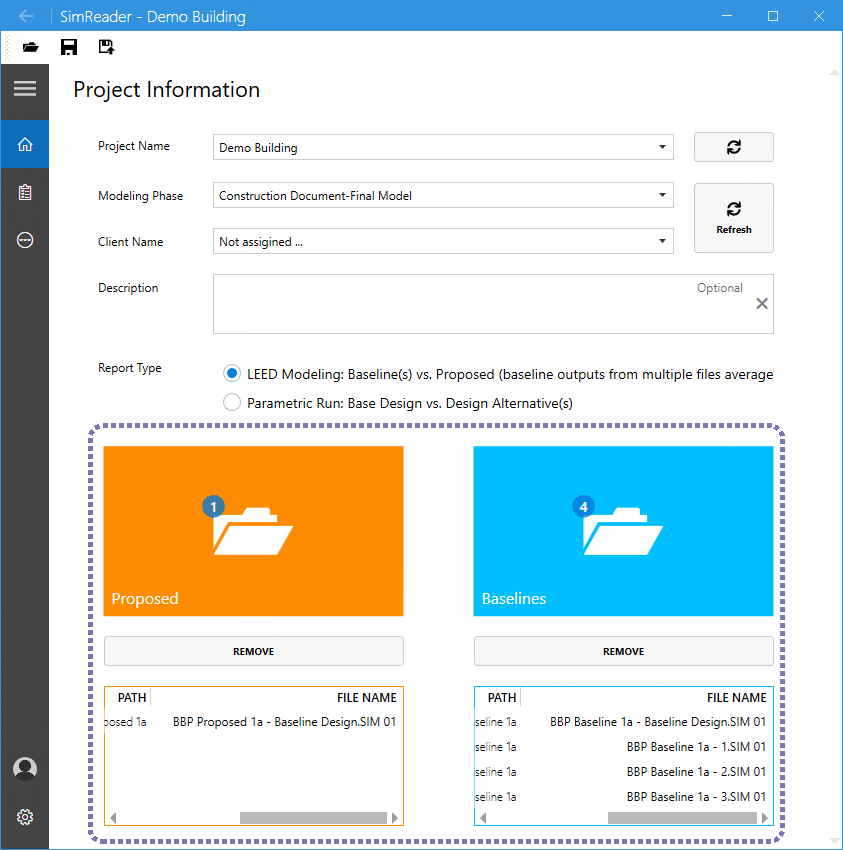
Click the Proposed and Baseline Buttons to include SIM files.
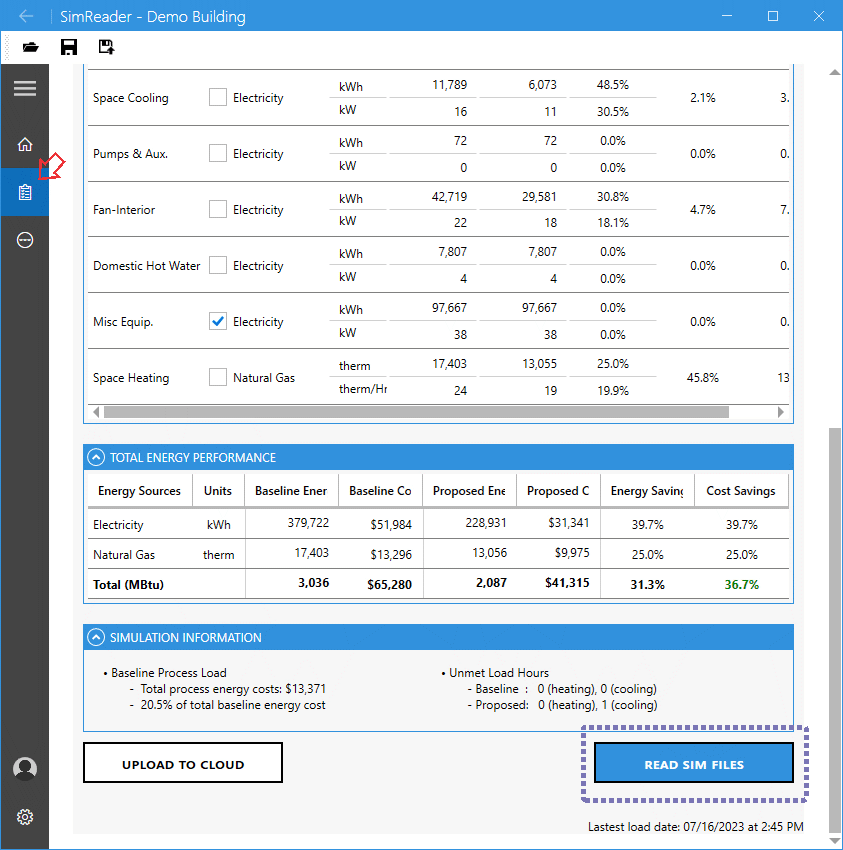
Go to the Summary tab and click the “READ SIM FILES” button.
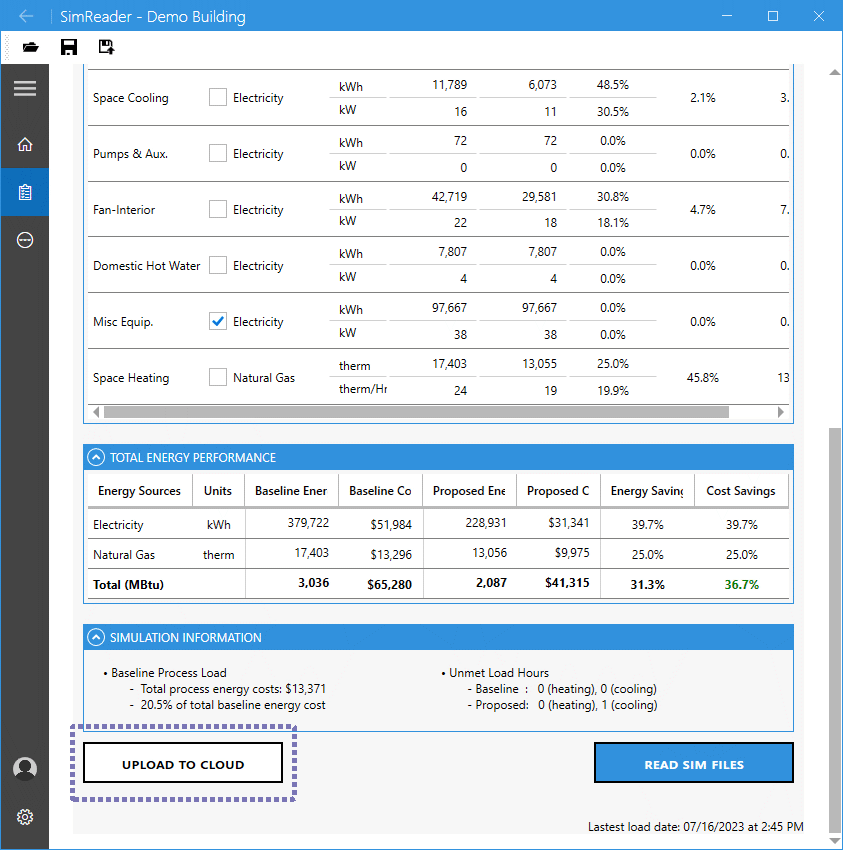
Click on the “Upload to Cloud” button to upload them.
If you don’t see the modeling outcomes, try refreshing InverseHub to update the content. 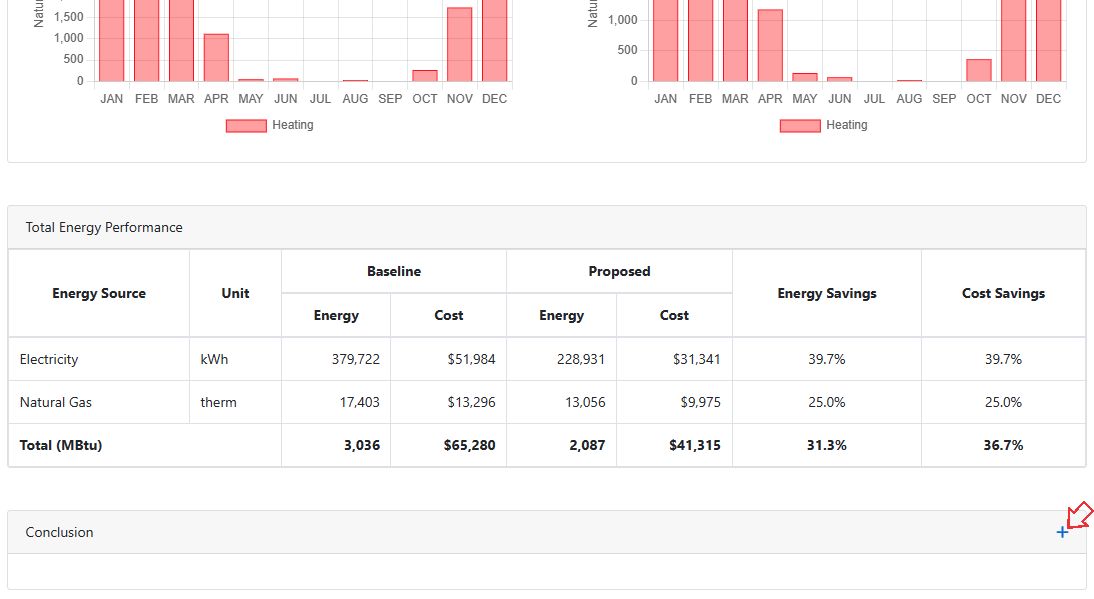
Add a conclusion.

Step 5: Share the Ouputs
There are two ways to share your model outputs: a view-only link and a commentable link.
To share a view-only link, simply click the Copy link button and email the link.

To receive comments on your model outputs, you need to invite reviewers via InverseHub. The reviewer will receive an email along with a 4-digit passcode.
